 how-to
How to Repair a Chipped Gel Nail at Home
Table of Contents
- Assess the Damage: Chip vs. Crack vs. Lifted Gel
- What You'll Need: DIY Gel Nail Touch-Up Kit Essentials
- Step-by-Step: How to Repair a Chipped Gel Nail at Home
- How Long Do Gel Manicures Last After a Home Repair
- How to Prevent Gel Nails From Chipping in the First Place
- When to Skip the DIY Repair and See a Professional
- Common Mistakes to Avoid When Repairing Gel Nails at Home
- Conclusion
- Frequently Asked Questions
Last Updated: October 8, 2026
Assess the Damage: Chip vs. Crack vs. Lifted Gel
The first step in deciding whether you can repair a chipped gel nail at home is understanding the damage. A polish chip, lifted gel, and a cracked natural nail each require a different approach.
What a Polish Chip Looks Like
A polish chip is surface-level damage: the colored layer has broken away, but the gel layer or natural nail underneath stays intact. You'll see a small missing section of color, usually at the free edge or side.
Polish chips are the easiest to repair at home. The nail structure is sound. You're just filling in missing color.
Identifying Lifted Gel and Cracked Natural Nails
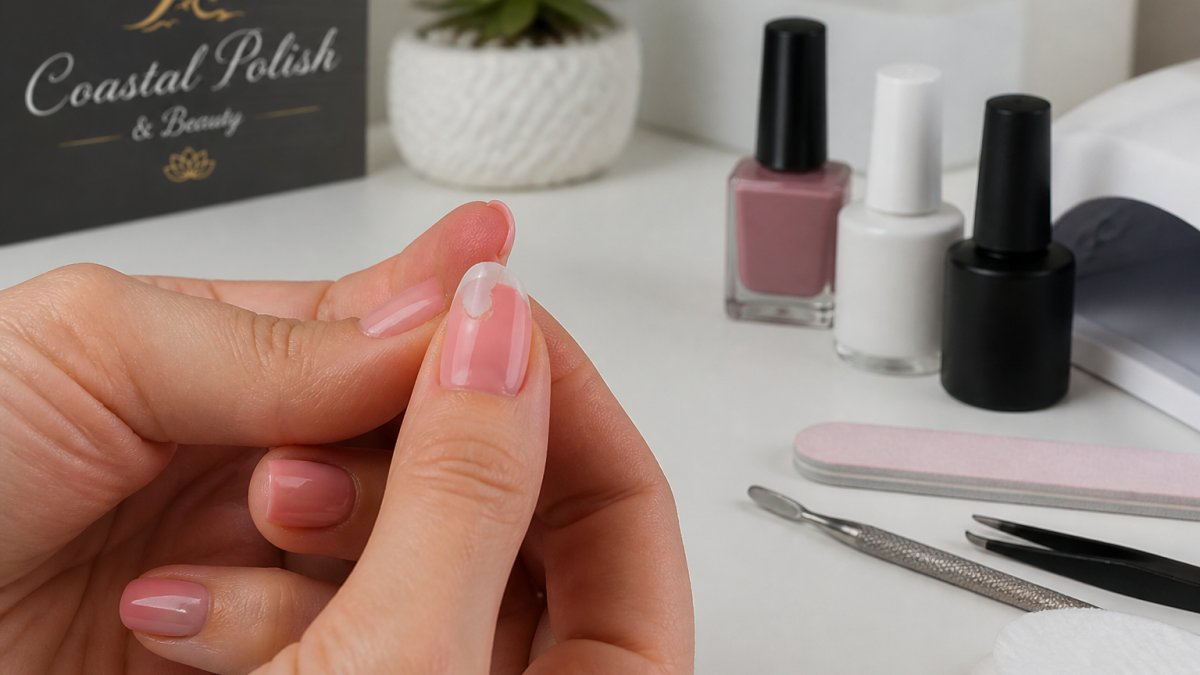
Lifted gel is different: the gel layer separates from the nail plate, creating a gap and often a white or discolored line. Trapped moisture can lead to infection if not handled properly.
A cracked natural nail means the nail plate itself has split or fractured, more serious than a polish chip, because the damage goes through the entire nail structure.
The Triage Test: Three Questions Before You Touch Anything
Before you reach for a file, run these three checks.
1. Does the gel move when you press it? Press the gel edge with a cuticle stick.
2. Is the natural nail underneath intact? A smooth, continuous nail plate means a chip.
3. Is there pain, redness, swelling, or discharge? Any of these means the issue is past cosmetic.
What Each Damage Type Means for Your Repair
| What you see | What it is | Home repair? |
|---|---|---|
| Missing color at the free edge, smooth nail underneath | Surface polish chip | Yes, proceed to the step-by-step below |
| Gel edge lifts when pressed, gap visible, no pain | Lifted gel | Only if the lift is small and the nail underneath is dry and intact; otherwise remove |
| Gel lifts more than about a quarter inch, or moisture/discoloration underneath | Significant lifting | No, professional removal |
| Crack or split in the natural nail, especially into the pink area | Damaged natural nail | No, professional assessment |
| Pain, redness, swelling, pus, or a dark discoloration | Possible infection | No, see a healthcare provider |
Why This Distinction Matters for Gel Specifically
Gel is cured, not dried, so it forms a solid film bonded to the nail plate. When that film lifts, it doesn't flake away like regular polish, it stays attached at the edges and creates a pocket, the mechanism behind most gel-related nail problems.
If your damage passes all three triage questions, gather your tools. If it fails any, skip ahead to when to see a professional.
What You'll Need: DIY Gel Nail Touch-Up Kit Essentials
Gather the right tools before you start, having everything ready prevents mistakes and speeds up the process.
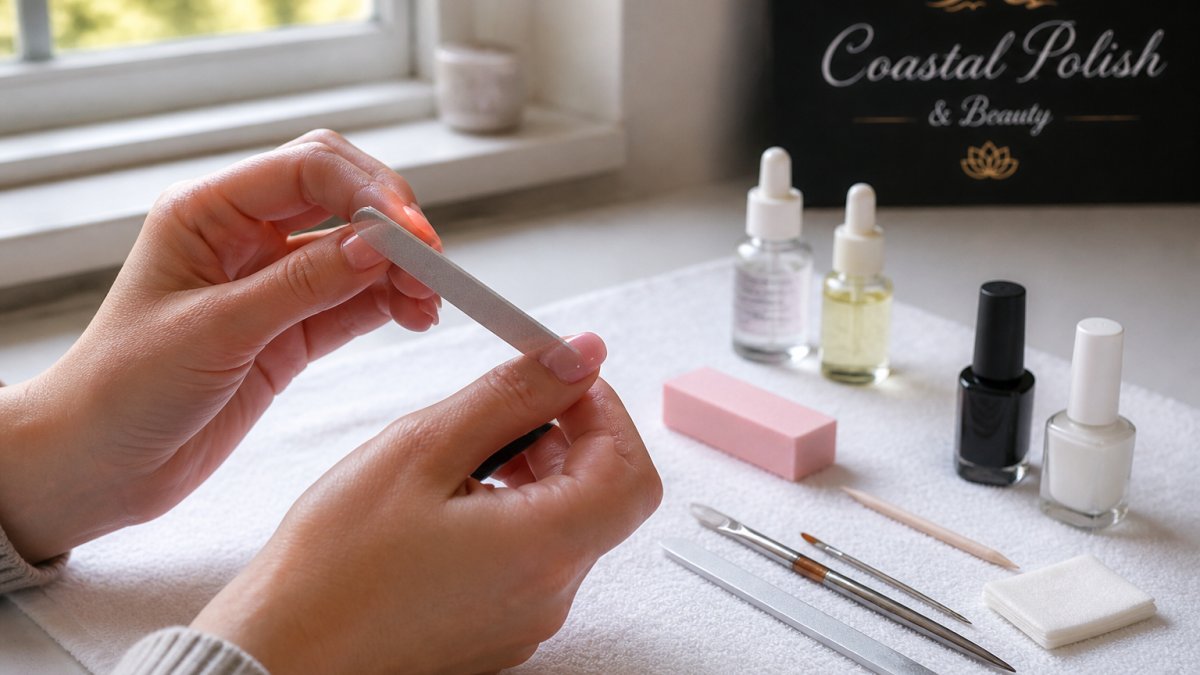
Essential items for a DIY gel nail touch-up kit:
- Nail file (220-grit or higher for smoothing)
- Buffer (soft buffer for gentle polishing)
- Lint-free wipes or cotton pads
Quality matters: a cheap file can damage your nail plate, and lint-free wipes prevent fibers from getting trapped under your repair.
If you're using gel products, you absolutely need a UV or LED lamp. Without proper curing, the repair won't hold.
Step-by-Step: How to Repair a Chipped Gel Nail at Home
This sequence is written for gel. For a regular polish chip, the same prep steps apply, but you'll air-dry instead of cure. The gel-specific details below, product compatibility, cure times, and the glue question, separate a repair that lasts two weeks from one that peels off in two days.
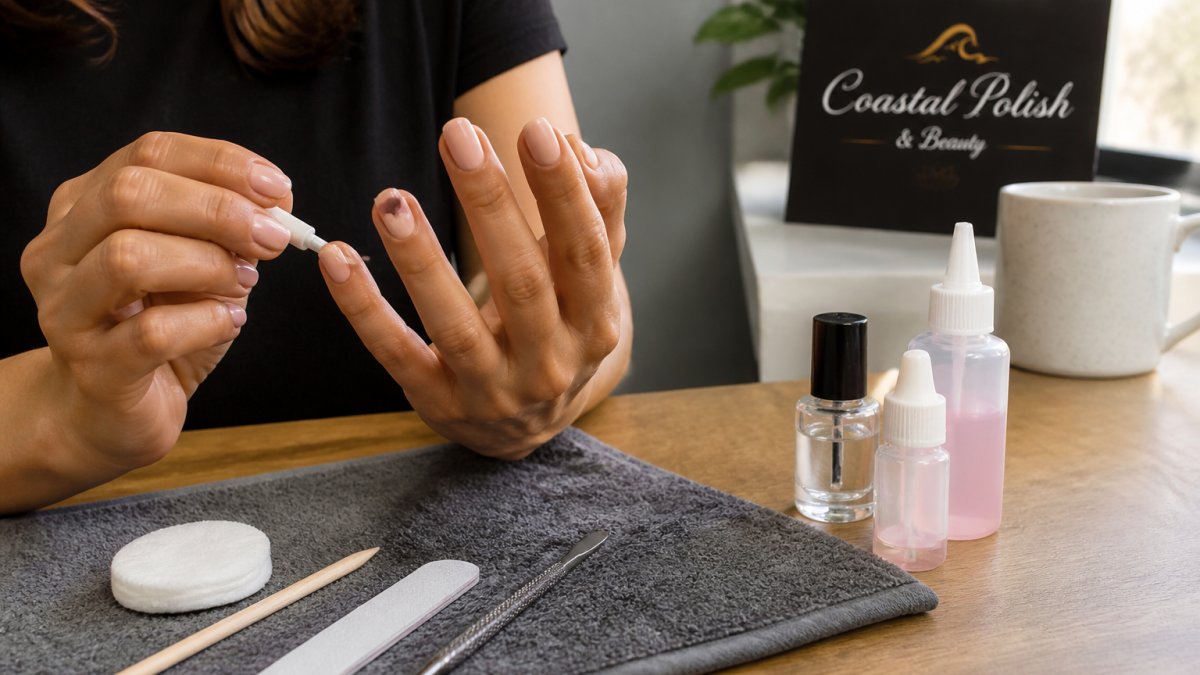
Step 1: Prepare and Clean the Nail Surface
Start with a clean nail: wash your hands with soap and water, then dry completely, since any moisture or debris prevents adhesion.
Clean the damaged area and surrounding nail with isopropyl alcohol (90% or higher) on a lint-free wipe to remove oils, dust, and loose old product, then let it dry completely.
This prep takes two minutes but makes a huge difference in durability.
Step 2: Buff and Smooth the Chipped Area
Use a 220-grit file to gently smooth the rough edges around the chip, filing in one direction rather than back and forth to avoid splintering.
Next, use a soft buffer to create a slightly textured surface where the repair product goes, a smooth, shiny nail won't hold new gel as well, and the buffer's tiny grooves help adhesion.
Don't over-buff: light pressure is enough for a matte finish, not deep scratches. If you buff through to a pink or tender area, stop.
Step 3: Decide on Your Repair Method Before You Apply Anything
This step determines whether your fix holds. Match the method to the chip:
- Tiny free-edge chip (smaller than a pencil eraser): A gel top coat alone can often bridge the gap. Apply, cure, and you're done.
- Small chip with visible color missing: Base coat, color coat, top coat, all gel, all cured between layers.
- Chip at the sidewall or near the cuticle: These are high-flex areas. A gel patch here needs a slightly thicker base layer to resist flexing, or it will crack again.
Step 4: The Glue Question, When Not to Use Nail Glue
Nail glue is not a universal fix, and using it on the wrong damage makes things worse. Skip the glue if:
- The nail is painful, red, swollen, or has any discharge
- The gel is lifted more than a small edge, glue will seal moisture underneath
- The natural nail is cracked into the pink nail bed
Glue suits only a clean, dry, small chip where the natural nail is fully intact and the surrounding gel is firmly attached. Even then it's a stopgap, not a repair, it doesn't match the color and must be removed at your next appointment.
Step 5: Apply and Cure Your Repair
For a gel repair, apply a thin coat of gel base coat to the prepared area. Cure under your UV or LED lamp for the time on the product, typically 30 to 60 seconds for LED, 60 to 120 seconds for UV.
Apply gel color in thin layers: two thin coats cure more evenly than one thick coat and are far less likely to chip again. Cure between each coat.
Schedule and Appointment today for 10% Off your service →
For a regular polish chip, apply base coat, let it dry, then two thin color coats, letting each dry fully. No lamp needed.
Step 6: Seal With Top Coat
The top coat seals and protects the repair. Apply a thin, even layer over the entire nail, extending slightly past the free edge, this "caps" the edge and prevents the repair from catching and peeling.
For gel, cure again under your lamp; for regular polish, air dry. A good top coat keeps the repair from chipping immediately.
Step 7: Check the Cure Before You Move On
After the final cure, press the repair with a clean fingertip. It should feel hard and smooth, with no tacky spots.
Wipe the nail with isopropyl alcohol to remove the dispersion layer, then wash your hands. Total time is usually 15 to 20 minutes for one nail.
How Long Do Gel Manicures Last After a Home Repair
A home repair to a chipped gel nail typically lasts 1-2 weeks, depending on execution and stress on that nail, shorter than a full gel manicure's 3-4 weeks.
The reason is simple: your repair is a patch, not a full gel layer, so its edges catch and peel more easily than a professional manicure.
You can extend the life of your repair by:
- Keeping the nail dry for at least 24 hours after repair
- Avoiding activities that put pressure on that nail (opening cans, typing heavily)
- Applying fresh top coat every few days
If your repair fails before two weeks, the surface usually wasn't properly prepared or the layers were too thick.
How to Prevent Gel Nails From Chipping in the First Place
Prevention is easier than repair, a few habits can significantly extend your gel manicure's life.
Protect your nails during daily activities:
- Wear gloves when washing dishes or cleaning
- Use your knuckles instead of your fingernails to open things
- Keep nails moisturized, dry nails are brittle nails
- Apply fresh top coat every 3-4 days to seal the edges
- File any rough spots immediately before they catch and chip
- Keep the free edge smooth and even
Choose the right nail shape:
- Shorter nails chip less than long nails
- Square or rounded edges are more durable than pointed tips
- Almond shapes offer a balance between strength and style
When to Skip the DIY Repair and See a Professional
Some damage is too serious for home repair. Know when to stop and call a professional.
See a professional if:
- The gel is lifted more than a quarter inch from the nail plate
- The crack extends into the nail bed (the pink area under the nail)
- You see signs of infection (redness, swelling, pus, or pain)
Lifted gel that traps moisture can lead to infection, so professional removal is safer than a home fix. A crack extending into the nail bed needs professional assessment to prevent permanent damage.
When in doubt, book an appointment. A professional can assess the damage in person and recommend the best path forward.
Common Mistakes to Avoid When Repairing Gel Nails at Home
Skipping surface preparation. This is the number one reason home repairs fail.
Not letting products dry or cure fully. Rushing this causes failure within days, follow your products' time recommendations.
Applying repair products to a wet nail. Moisture compromises adhesion, so wait until the nail is completely dry.
Using old products. Gel and regular polish have shelf lives; old products don't cure or dry properly.
Conclusion
But home repairs are temporary solutions. If chipping happens repeatedly, it's worth asking why. Short nail shapes, regular maintenance, and protective habits prevent most chips before they start.
When a chip does happen, you now know whether to handle it at home or seek professional help. And if you're tired of managing repairs between appointments, Coastal Polish & Beauty offers professional gel manicures.
Frequently Asked Questions
Is it normal for gel polish to chip after one week?
Gel manicures typically last 3-4 weeks, so chipping within a week is not ideal. Early chipping often results from insufficient surface preparation, thin application, or exposure to harsh chemicals before the gel fully cured. If your gel nails consistently chip early, discuss application technique with your technician or switch to a salon that prioritizes proper nail prep and curing time. Home repairs can extend the life of your manicure between professional appointments.
Can I use regular nail polish to cover a gel chip?
Regular nail polish will not adhere properly to exposed gel polish or the chipped area because gel requires a sticky base layer for adhesion. For a temporary fix, you can apply regular polish over the top coat, but it will chip quickly and won't seal the damaged area. A proper gel repair uses gel polish and a UV or LED lamp to cure, which creates a durable seal. If you don't have gel supplies, schedule a professional touch-up at your salon.
How to repair a broken gel nail at home without professional tools?
A true gel repair requires at least a UV or LED lamp to cure the product; without it, you cannot properly seal the damage. However, you can smooth rough edges with a nail file and apply a temporary protective top coat to prevent further peeling. For a more durable fix, invest in an affordable home gel kit with a small LED lamp. If professional tools aren't available, visit your salon for a proper touch-up to prevent the chip from spreading and damaging the nail plate underneath.
How long should a home gel repair last before I need a professional touch-up?
A well-executed home gel repair can last 1-2 weeks, depending on the chip size and your daily activities. Larger chips or repairs near the free edge (tip) tend to fail sooner because they endure more stress. Your next professional manicure will remove the temporary repair and apply a fresh gel layer, restoring full durability. To extend the life of your repair, avoid harsh chemicals, wear gloves when cleaning, and be gentle with your nails during the first 24 hours after curing.